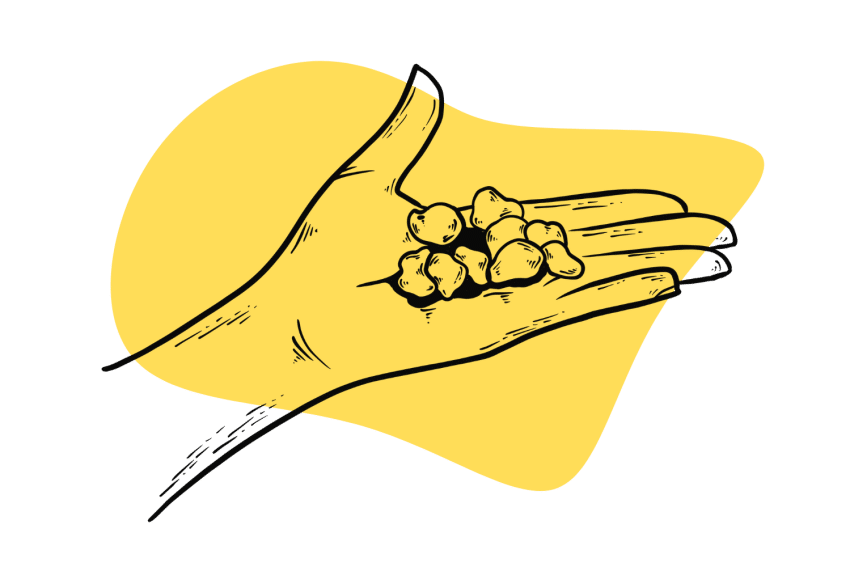
How To Grow Magic Mushrooms: The Easy Way


There’s no better way to secure a consistent source of psychedelics than to grow them at home yourself.
The process of growing magic mushrooms is incredibly rewarding, and if done correctly, can yield an endless supply of magic mushrooms for microdosing or self-discovery and development.
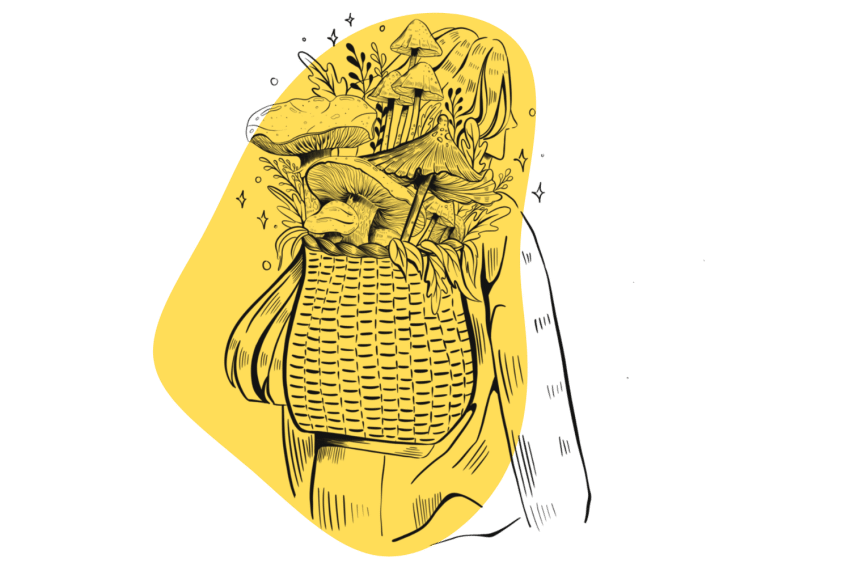
In this guide, we’ll cover the fundamentals of growing magic mushrooms using the PF Tek method.
I’ll provide insight into how I optimize the growing environment to produce copious amounts of mushrooms without having to buy expensive equipment or build complex setups.
This article is intended to serve as a basis for new mushroom growers looking for the fastest and simplest method of getting started.
What You’ll Need to Grow Magic Mushrooms At Home
- Magic mushroom spores — here’s where you should buy your spores
- Glass jars — go for the wide-mouth jars (½ pint or 1 pint)
- An incubator — you can buy an incubator or make your own
- A fruiting chamber — you can buy one or make your own
- Substrate — vermiculite & brown rice flour
- Filtered or distilled water — tap water will contaminate your inoculum
- Perlite — for water retention
- A spray bottle — for keeping your substrate moist
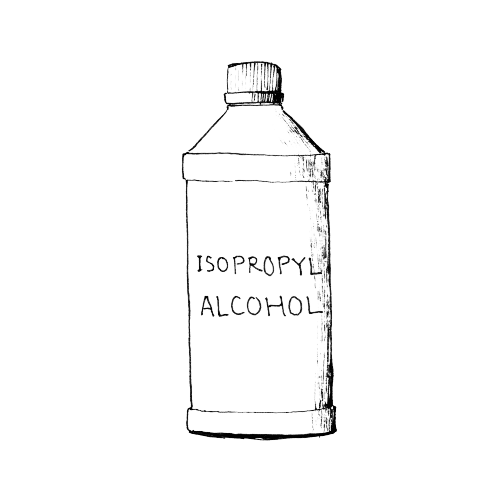
- 70% Isopropyl alcohol cleaning solution — 70 percent works better than 90 percent
- A lighter — Bic works, but I prefer using a Zippo so I can leave it on
- Nitrile gloves — for sterility
- Tinfoil
- Measuring cup
- Large mixing bowl
- A pressure cooker or Instant Pot
- Thermometer
Mushroom Cultivation Terms & Definitions
- Substrate — This is both the medium on which mycelium will grow, as well as its source of food.
- Inoculation — The process of introducing the desired organism into its growing environment.
- Mycelium — The underground body of the fungi made up of millions of tiny threads.
- Sterilization — The process of killing all forms of life within a substrate through very high heat (>121°C).
- Pasteurization — The process of killing most forms of life within a substrate through high heat (>70ºC).
- Incubation — The period needed for the mycelium to grow and colonize a substrate jar.
- Fruiting chamber — The container used to stimulate the growth of mushrooms (fruiting bodies).
Where Can I Buy Magic Mushroom Spores?
Everything on the list above is easy to find at local grocery stores or hardware stores — except for the magic mushroom spores themselves.
Spores are like the “seed” of a fungus. When they’re exposed to the right conditions, they begin to multiply and form the fungal body.
Magic mushrooms are illegal throughout most of the United States, Canada, and Europe — but the spores are not.
This is because magic mushroom spores don’t contain any of the active psychedelic substances called psilocybin and psilocin.
Because of this, you can find companies selling magic mushroom spores all over the internet. They’re usually sold in the form of spore syringes, but you can also find spore prints or liquid cultures as well.
Syringes are preferred because it’s much easier to inoculate the substrate jars you’ll be making later.
I’ve ordered spores from many different places, but my favorites are Spores 101 (Canada & United States) and Spores Lab — (Canada only).
What Are the Best Magic Mushroom Strains For Beginners?
- Golden Teacher — Best strain for beginners
- Penis Envy — Strongest strain
- Koh Samui — Very large mushrooms
- Orissa India — Second strongest strain
- Cambodian — Excellent mold-resistance
- Z-Strain — High yields & high potency
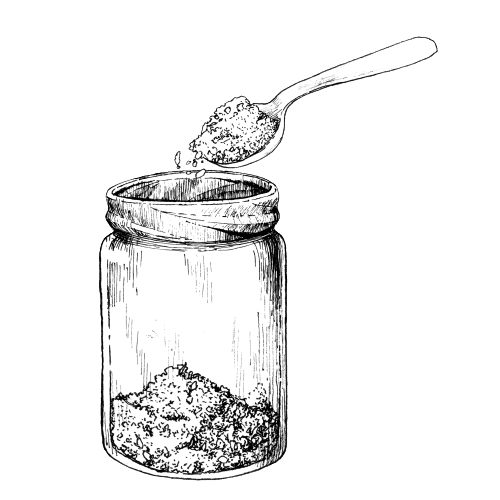
Step 1: Preparing the Substrate
Timeframe — 30 minutes
The first step is to prepare the substrate for your mushrooms to feed and grow on. Fungi live inside their food. They stretch long strands of mycelia throughout the substrate and secrete enzymes that break it down so they can absorb the nutrients.
This stage involves setting up a simple food source the fungi can feed off as it develops their mycelial network.
In the early stages of growth, the fungi will compete with other organisms — such as bacteria and mold.
Psilocybe cubensis is much stronger than mold and bacteria once it’s established, but it grows at a slower pace. If all three organisms are introduced into the fresh substrate, the mold and bacteria will outcompete the magic mushrooms 10 out of 10 times. They take over the substrate and prevent the magic mushroom from growing.
So the trick here is to completely sterilize the substrate, so the mushroom spores have a complete monopoly over the food source. This removes the competition and allows your mushrooms to dominate the substrate without having to compete with mold or bacteria.
There are many different formulas for substrates to use, but the easiest is the PF Tek method. You can also use wild bird seed, rye grain, and much more.
We’re going to cover PF Tek because it’s the easiest one to find success with if you’re just getting started. It’s the most resistant to mold and bacteria and makes fruiting super easy later on.
How To Prepare Your Substrate for PF Tek
First of all, PF Tek stands for Psylocybe Fanaticus — a pseudonym for the late Robert McPherson, who came up with the idea. It combines brown rice flour (the food source) with vermiculite and water.
The fungi eat the brown rice flour for food, and the vermiculite serves as a structure for the mycelial network to grow on.
The end result yields thick white “cakes” of mycelium that can be placed directly into the fruiting chamber later. Mushrooms will grow directly from these cakes.
Here’s how to set it up:
A) Mix Your Ingredients In A Large Bowl
The ratio of ingredients is going to be 2 parts vermiculite, 2 parts brown rice flour, and 1 part water.

Start by adding the vermiculite. For 5 half-pint jars, you’ll need roughly 2 cups (500 mL) of vermiculite.
Next, add the water and mix it with vermiculite. It should be wet but without water pooling at the bottom of the bowl.
The final step is to add brown rice flour. Mix it around thoroughly. It should form an even coat of flour over the damp vermiculite.
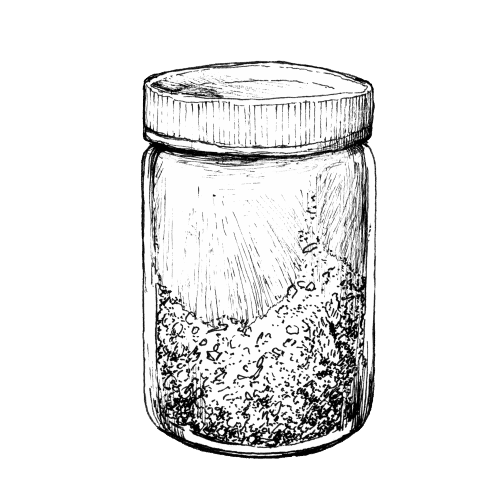
B) Fill The Mason Jars With Substrate
Fill each of the jars with the substrate you’ve created, but leave about 3 cm (1 inch) from the top of the jar. Fill this last part with dry vermiculite. The point of this is to prevent the seal of the jar lids from getting wet, which could lead to contamination.
C) Seal The Jars With Tin Foil
Once the jars are full of substrate, add the lids and seal them. I recommend placing the jar lids upside down so the rubber seal is on facing upwards. This is because once you pressure cook them, the temperature change suctions the lids onto the jar and makes it virtually impossible to take them off later. Putting the lids on upside down helps prevent this from happening.
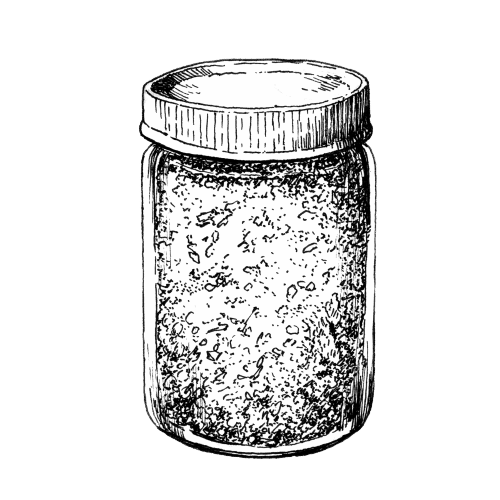
Wrap some tinfoil over the top of the jars as well. This helps keep them sterile and prevents water from getting into the jars as you pressure cook them.
Most pressure cookers should have a fill line marked on the inside. Add the jars, then add the water to the fill line.
If there is no fill line, add enough water so that the jars are roughly halfway submerged. Do not allow the jars to be covered entirely in water.
D) Sterilize The Jars
Now that the jars are fully loaded with your substrate and sealed up, you must sterilize them to prepare them for inoculation. This is done using a pressure cooker. Instant Pots also work great for this, as they’re essentially just a glorified pressure cookers.
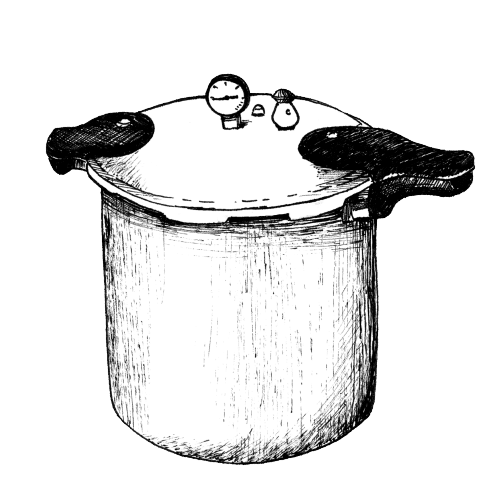
In order to fully sterilize them, you need to let them run for about 30 minutes once adequate pressure is reached.
I also add a spacer at the bottom of the pressure cooker using some scrunched-up tin foil to lift the jars off the bottom of the cooker. This helps give them a more even distribution of heat and prevents the bottom of the jars from burning.
Bring the cooker up to temperature (it will start to release steam), and then start your timer for 30 minutes.
Once 30 minutes is complete, turn off the heat and give it a few hours to cool down.
Step 2: Inoculation
Timeframe — 30 minutes
This stage involves introducing the mushroom spores to the growing environment you just created for them. This process is called inoculation.
The goal here is to add a small dose of spores to each jar, without allowing any other contaminants that would compete with the magic mushroom. There are millions, if not billions, of mold spores floating around in the ambient air at any given point. This is true no matter how clean your house may be. They float in from outside air, they travel on our skin and clothes, and our pets drag them in after rooting around in the yard.
If any of these spores get into the jar, they could outcompete our mushrooms and contaminate our spawn jars. For a split moment, you’ll need to open the jar to inject the spores. It’s during this step that contaminants have their opportunity to get into the jar.
The trick to being successful during this stage is to keep the area as clean and sterile as possible:
- Seal off a spare room or bathroom a few hours before inoculation
- Clean the room with isopropyl alcohol, concentrating on the surface you’re going to be working on
- Spray some aerosol disinfectant throughout the room before you begin
- Wear gloves, a mask, and put on a fresh set of clothing
- Turn off or seal any vents to prevent the air from circulating during the inoculation
- Make a sealed “glove box” to reduce exposure to ambient air
Of course, you don’t need to do all of this, but the more steps you take to keep the area clean, the more successful this step is going to be. You can’t be too clean during this stage.
Now we’re ready to inoculate the jars, here’s how it works:
A) Thoroughly Clean The Area
Before inoculation each jar, you should wipe down your hands and the table you’re working on with alcohol.
Grab a sterilized jar, and wipe it down with alcohol too.
B) Inject Some of the Spore Syringe Into the Jar
If you’re using a spore syringe (recommended), take it out of the package, and add the needle tip. Be very careful not to touch the tip.
Using your lighter, heat the metal tip of the syringe for a few seconds. This will serialize the top of the needle. Once it’s cooled, open your first jar and inject about 2 CCs of the liquid inside the syringe. Make sure you place the needle tip past the first 2 or 3 cm of dry vermiculite, so it comes in contact with the substrate directly.
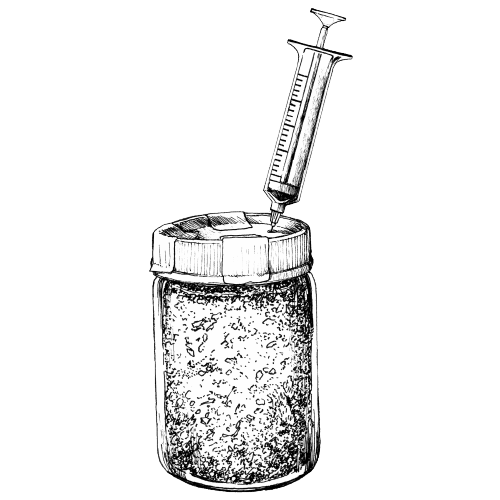
Try and only open the jar enough to get the syringe in, rather than taking the lid off directly. This will help prevent contamination.
Once this is done, seal the jar and cover the top in tin foil.
C) Rinse & Repeat
You’re going to need to repeat this process, one by one, for each jar. Make sure to wipe down your hands, the table, and jars individually with alcohol each time.
Sterilize the needle with the lighter after every jar as well to prevent cross-contamination from one jar to the next.
It’s tedious, but it’s essential if you want this to be successful.
Step 3: Incubation
Timeframe — 1–2 weeks
Now that your substrate has been inoculated with the mushroom spores, the goal is to set up the ideal conditions for it to thrive. From here you just sit back and wait for it to be ready.
The ideal conditions for Psilocybe cubensis during this stage are as follows:
- Humidity — High (>80%)
- Temperature — 20–28 ºC (68–82ºF)
- Light — None
- Airflow — Low or none
The easiest way to do this is to build what’s called an “incubator.”
There are many ways to build an incubator, and you can buy professional ones as well. In most cases, it doesn’t need to be that complicated. Just take an opaque container (a paint bucket works well), fill it with your inoculated jars, and place it in a warm spot somewhere in your house.
You only need to build an incubator if you don’t already have a spot in your house that’s dark and warm (but not hot) to keep your substrate jars. The cupboards above the fridge work very well for this.
Here’s a simple incubator design anybody can build for less than $30:
- Find two identical containers (not clear)
- Fill the bottom one about 30% full of water
- Place an aquarium heater in the bottom bucket and turn it on
- Add the second bucket inside the first one
- Place your jars inside the second bucket and seal it up
Fill your incubator with the jars, and place the lid on top. You’ll need to wait about 1 or 2 weeks for the jars to colonize with mycelium before you can move on.
Check the jars every couple of days. By the third or fourth day, you should start to see some white “threads” forming near the inoculation site. This is why it helps to inoculate the jars on the side of the glass so you can see the mycelium forming sooner.
Look for signs of contamination. This includes green or bluish-colored growth, very fuzzy white growth (rather than thready), or a slick, oily look (bacteria).
If you find any contaminated jars, remove them from the incubator immediately. They could spread the contaminant to other jars if you leave it in the incubator.
You’ll know the jar is complete when it’s completely filled with white mycelium.
Step 4: Fruiting
Once your jars are fully colonized, the next step is to initiate fruiting. This involves creating the ideal environment for the mycelium to produce mushrooms — which are the reproductive organs for the fungi.
The ideal conditions for fruiting are as follows:
- Humidity — High (>80%)
- Temperature — 10–20 ºC (50–68ºF)
- Light — Low (indirect light)
- Airflow — Moderate
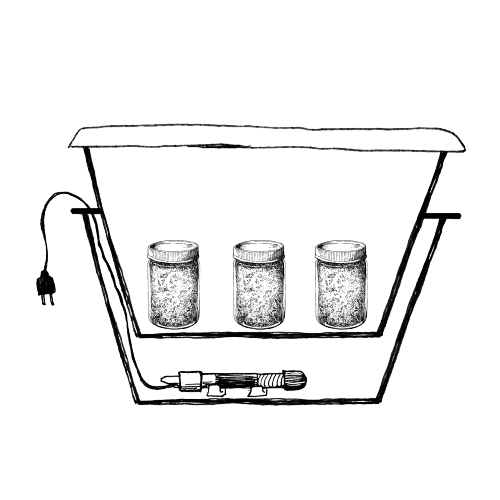
The best way to do this is to create what’s called a “fruiting chamber.”
Fruiting chambers can be purchased or made using household materials. The basic principle involves using a clear container (to allow some light to enter), that allows some airflow and maintains high humidity. There are many different philosophies around fruiting chamber design. I’ve tried virtually all of them and have found the simplest setups always have the best results.
When you try and overcomplicate things, they tend to fail. As long as the conditions above are met, your mushrooms will start to grow. It’s actually surprisingly easy to achieve these conditions by simply spraying your substrate with water for hydration, and keeping the chamber in a spot in your house that’s out of direct sunlight.
Up until this point, your mycelium has been living in a completely sterile environment to avoid being killed by mold or bacteria.
By now, your mycelium is strong and will be able to resist most fungal or bacterial invasions, so it no longer needs to be kept completely sterile.
However, it’s still important to keep the fruiting area clean to allow you to get as many mushrooms as possible. They will eventually start to mold after it’s spent their energy creating mushrooms.
Here’s how to build a simple fruiting chamber for PF Tek:
- Grab a clear container large enough to hold all of your substrate jars
- Drill some small holes in the top and sides of the container to promote airflow
- Wipe the entire container down with isopropyl alcohol and give it a few minutes for the alcohol to evaporate
- Fill the bottom 3 cm (1 inch) of the container with perlite
- Add filtered or distilled water until the perlite is moist, but not soaking wet. If there’s any excess water, make sure to drain it off before moving on
- Place the mycelium inside the container — you can either place the jars themselves, with the lids off or take the mycelial cake out of the jar and place it on a jar lid on the bottom of the fruiting chamber
Check on your mushrooms every day to see how they’re doing. Take the lid off and use it to fan some fresh air into the container. Using the spray bottle, give the perlite a spray of water (distilled is best) to make sure it stays moist.
Try to avoid spraying the cakes directly. If water pools on top of the cakes, it can lead to bacterial growth.
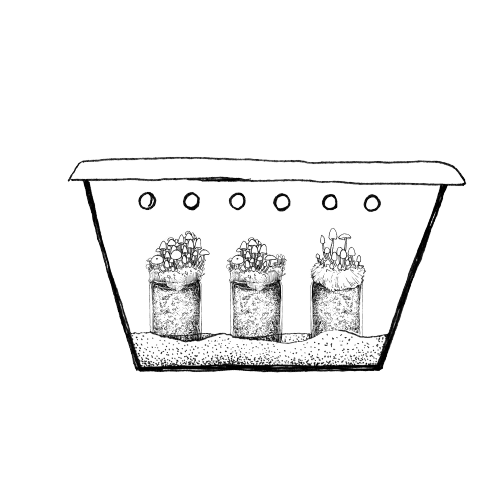
After a few days, you should start to see some small mushrooms forming on the side of the cake. Don’t touch them, if you touch these little “pinheads,” they may stop growing.
Allow your mushrooms to continue growing until you see the veil at the bottom of the gill cap break — now they’re ready for harvesting.
Step 5: Harvesting & Drying
When your mushrooms are ready to harvest, pinch them off at the base. They should break off easily without much effort.
Only harvest the mushrooms that are ready. You may need to harvest a few mushrooms every day until they’re all done.

Now you just need to dry your newly harvested magic mushrooms by placing them on a dry paper towel for a few days. You can also use a dehydrator, but make sure to use the lowest temperature setting.
Your mushroom cakes will continue to produce mushrooms for a while. Each round of mushies they produce is called a flush.
After 2 or 3 flushes, you may notice the shrooms seem to be sparser, or smaller. You can regenerate the cakes by dunking them in some ice-cold water for about 10 minutes and then placing them back into your fruiting chamber.
If you see any signs of mold on any of your cakes, remove the infected cake immediately. A little bit of mold isn’t going to hurt you, but if you leave it in the chamber it will spread to all of your cakes. It’s better to cut your losses and remove it completely.
Eventually, all cakes will lose vitality and succumb to mold.
Troubleshooting Tips & Tricks
Growing mushrooms don’t need to be complicated, and for the most part, they grow themselves. Aside from creating the ideal conditions for them to thrive, you don’t have to do much.
With that said, there are problems many growers (novice and expert alike) will encounter along the way.
Here are some of the most common issues growers experience and some solutions to try first.
Feel free to reach out via email — high@tripsitter.com — if you have any other questions. Pictures help a lot.
1. Mycelium Isn’t Growing in the Jars
You’ve inoculated your jars, but there are no signs of the white, thready mycelium forming.
There are a few potential causes for this, here are some of the main problems and how to fix them:
- Incubation temperature too low or too high — place a thermometer inside your incubator and make sure the temperature remains between 20 and 28 º C. Check it at the hottest point in the day, and the lowest.
- Contaminated substrates — sometimes contamination is hard to identify, but it will always stop the growth of the mushrooms, so it’s worth doubling down on your sterilization efforts during the inoculation stage if you keep getting issues.
- Faulty spore syringes — sometimes the syringes you order are either contaminated or didn’t contain any spores, to begin with. Always order from a reputable source of spore syringes.
- You’re not using enough spores when you inoculate — try using more liquid when inoculating each jar, you may not be delivering enough spores for them to take off in the substrate. I use about 2 CCs.
2. My Jars Keep Molding
The most common problem you’re going to encounter while growing mushrooms is contaminated substrate. This is true regardless of how experienced you are.
I’ve lost hundreds of jars from contamination during this stage, which is why I’m so adamant about being as extra as possible during the sterilization and inoculation stage. You really can’t be too clean here.
Use plenty of alcohol, build a glove box, or invest in a laminar flow hood to keep your area free from mold spores that are abundant in the air.
You can also make self-sealing injection ports for your jar lids so you don’t have to open them to the ambient air at any point. This is done using high-temperature gasket seals from an automotive shop and a nail.
Poke some holes in the jar lids and add a glob of the gasket sealer. Let it dry completely. You can then inject the syringe directly into these ports, which will self-seal when you pull it back out — thus limiting the chances of contamination.
3. Pinheads are Forming, but They Aren’t Growing into Mushrooms
If you’re seeing small pinhead mushrooms forming, but they never seem to grow into a complete mushroom, there are a few things you can do to fix it:
- Check the humidity — low humidity can cause the pinheads to abort. Make sure it remains at or above 80% relative humidity by keeping your perlite moist with a spray bottle
- The pinheads were touched — if they’re touched or moved, the pinheads will stop growing, avoid touching the mushroom cakes as much as possible
- Temperature too high or too low — if the growing conditions aren’t ideal, the mycelium will stop producing mushrooms. If this happens while some mushrooms are already growing, the fungi will abort them completely.
- Poor airflow — this is a common cause of pinhead issues. Mushrooms breathe oxygen and release CO2. If there isn’t enough airflow, the mushrooms will stop producing mushrooms and go into survival mode to get through the poor oxygenation.
4. My BRF Cakes Keep Molding
All cakes will eventually mold — but you should be able to get at least 2 or 3 flushes out of them first.
If your cakes are molding before you can harvest any mushrooms, you may need to take extra steps to keep the area clean. Consider the placement of your fruiting chamber. Is it in a part of the house that has a lot of ambient mold?
You may want to add some filtration to your chamber by adding some polyfill or other filtration material over vent holes.
It also helps to use reverse osmosis or distilled water in your spray bottle. Alternatively, you can sterilize a few jars of water in your pressure cooker and use this water to spray your fruiting chamber down.
Also see: Top 5 Mushroom Grow Kits (2023)
Best Books & Resources on Growing Magic Mushrooms
Mushroom cultivation is a very large topic. There’s an endless supply of techniques for preparing substrates, building incubators, setting up fruiting chambers, and optimizing production. If I were to cover all of these methods this post would be many thousands of words long.
While this resource is a great place to start and highlights the basic principles, if you’re looking to get into this hobby for real, I highly recommend you pick up one of these three books.
1. The Psilocybin Mushroom Bible: The Definitive Guide to Growing and Using Magic Mushrooms
(K. Mandrake)

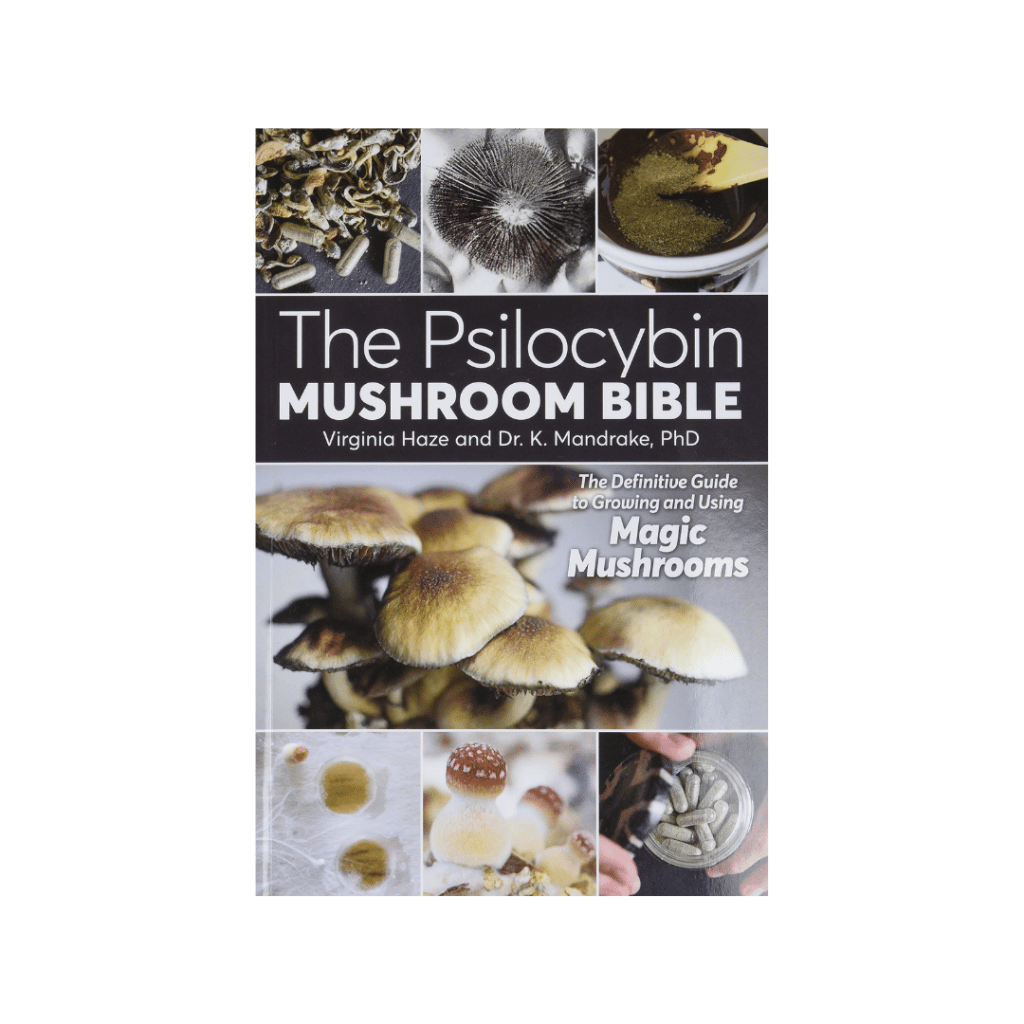
If there’s only one book I could recommend for the new mushroom grower, it would be this one. It’s large like a textbook and exceptionally comprehensive.
It mirrors the quality of another book mentioned below by Paul Stamets, but is specific to magic mushroom cultivation throughout, rather than digressing onto the cultivation techniques for other species of mushroom as well.
This book highlights several beginner and advanced methods for mushroom cultivation and offers plenty of expert tips and tricks, as well as troubleshooting for various problems you may encounter at each stage of production.
2. Psilocybin, Magic Mushrooms Grower’s Guide
(O. N. Oeric and O. T. Oss)
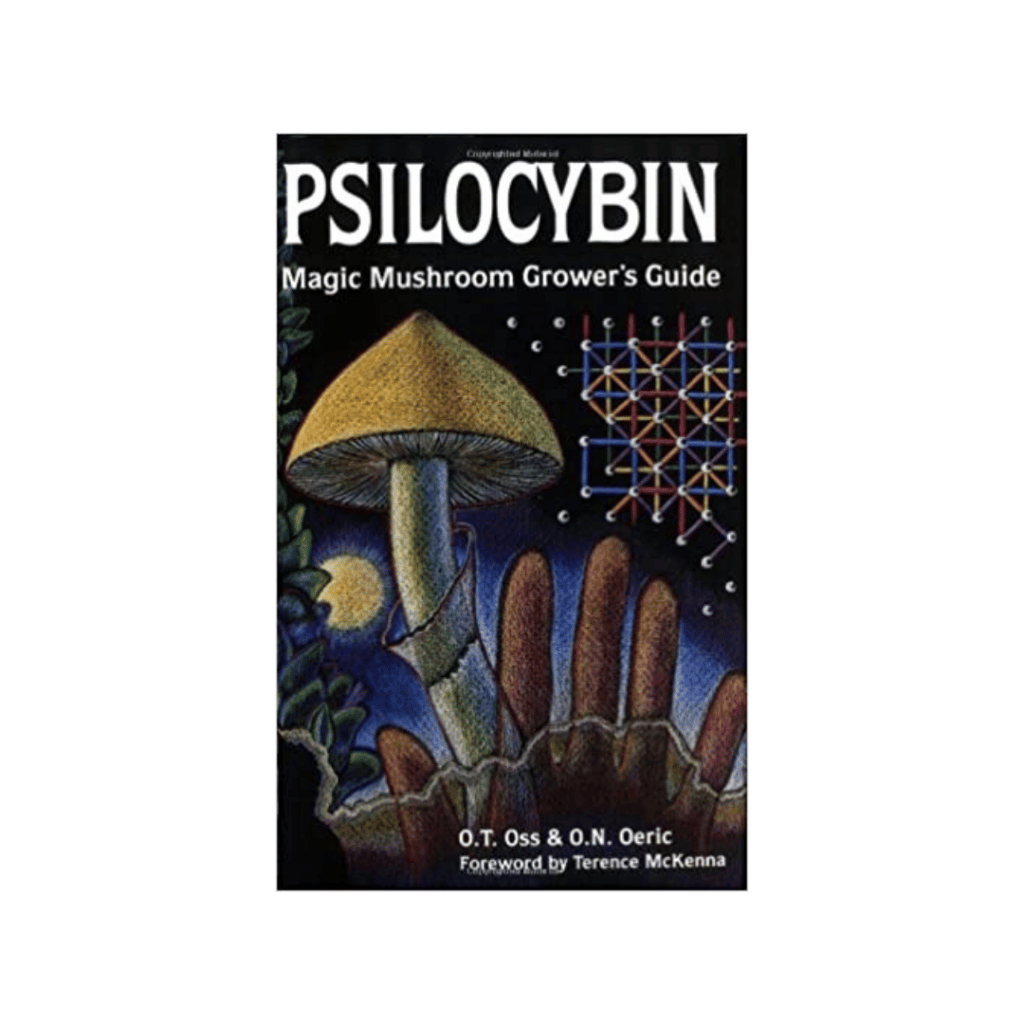
This is the first book I ever read on mushroom cultivation. It’s simple, concise, and the techniques outlined are very effective.
It was written by Dennis & Terence McKenna, but published under their pseudonyms. It was published in 1976 after visiting the Amazon rainforest to study entheogenic plants and fungi. They learned how indigenous cultures were growing the mushrooms and took some samples back to the US, where they perfected their process.
The McKennas are credited with bringing the production of psychedelics into the hands of the general public. It was the first time anybody had been able to cultivate these mushrooms outside of their natural habitat. It’s still considered canon on the topic of home cultivation.
3. Growing Gourmet & Medicinal Mushrooms
(Paul Stamets)
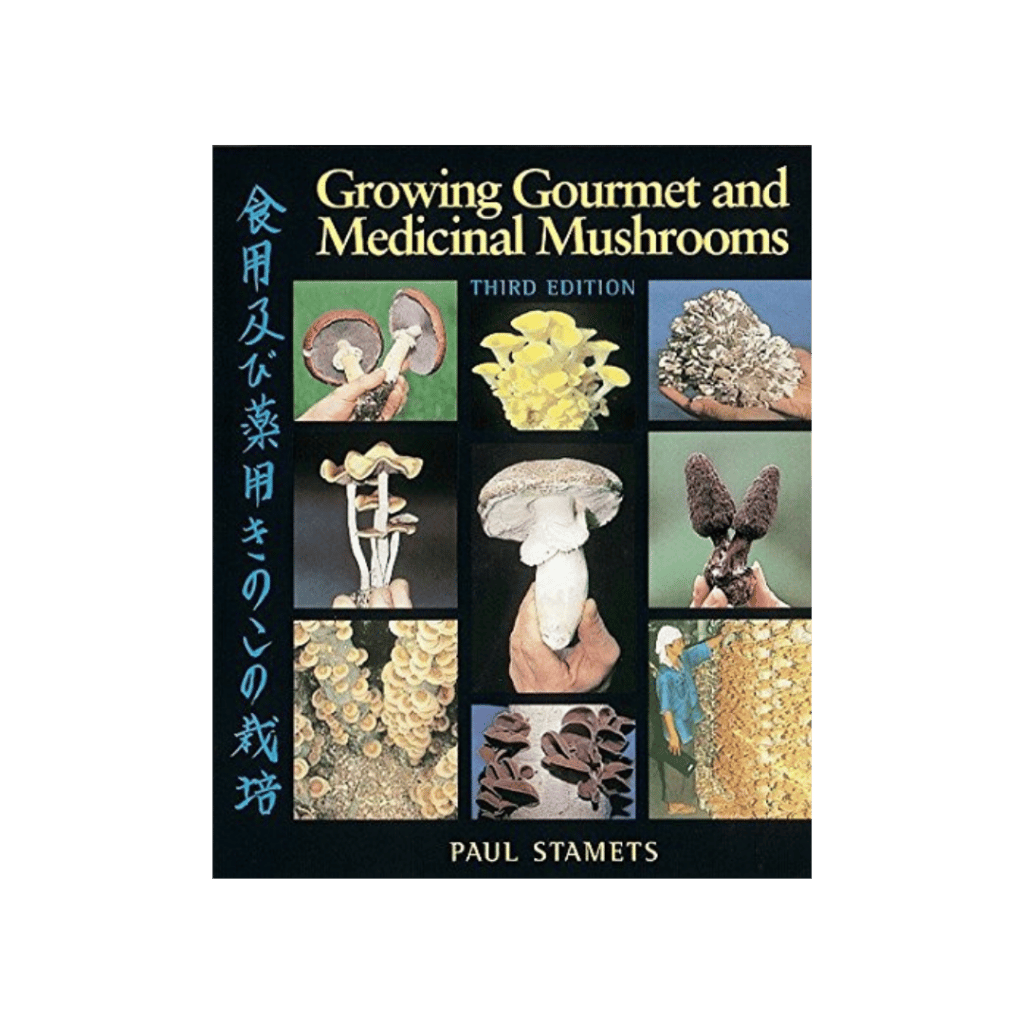
This book is, by far, the most comprehensive expert guide to growing medicinal mushrooms. It covers the cultivation of Psilocybe cubensis, as well as many other gourmet and medicinal species.
The author, Paul Stamets, is considered the ultimate authority on the cultivation of mushrooms. He’s the creator of Fungi Perfecti, the author of several well-known books about mushrooms, and a prolific speaker and educator on the topic of mushroom technology, cultivation, and supplementation.
Learn More: Advanced Magic Mushroom Cultivation
This article just scapes the surface. We’ve covered the basic concepts for a new mushroom grower to get started, but it goes much deeper.
Like all things, mushroom cultivation can be as simple or complex as you want it to be.
Believe me, I’ve tried every technique in the book, just for the sake of optimizing the process. What I’ve learned from this trial and error is that, for whatever reason, the simplest methods always produce the best results.
Despite having spent thousands of dollars on expensive setups and custom grow chambers, they have all failed to perform any better than a simple shotgun fruiting chamber — which is literally just a plastic tub with holes drilled in the side for air to flow (as outlined above). That’s it!
These days, I follow the KISS philosophy when it comes to growing mushrooms — ”keep it simple, stupid.”
With that said, there are a few ways you can optimize the yield with some more advanced methods, without getting too complicated.
Six Advanced Cultivation Techniques to Optimize Yields & Cut Costs
1. Rye Grain Spawn
The method above highlights the process for PF Tek — which uses brown rice flour, vermiculite, and water. It’s the simplest, and most fool-proof method for growing shrooms. Any new grower should start with this method before moving on.
However, PF Tek has its limitations. It produces a lower yield than rye grain, and it isn’t possible to perpetuate the mycelial phase.
Rye grain is harder to get right and more prone to contamination, but provides much larger yields and allows you to perpetuate your mycelium without having to buy more spore syringes for every batch.
When one jar of rye grain is complete, you can use it to inoculate 10 more jars — thus increasing your stock exponentially.
2. Monotubs
A monotub is the simplest of the “advanced techniques”. It involves inoculating the bottom layer of a fruiting chamber directly before fruiting.
Monotubs produce very high yields and are simple to make and maintain.
3. Laminar Flow Hood
A laminar flow hood isn’t a technique, but a piece of equipment. It works by blowing air through a HEPA filter to remove all particulate. This tool is used during the inoculation stage to prevent contamination of your jars.
These can be very expensive, but I picked one up a few years ago for around $400 from Fungi Perfecti and it’s completely changed the game for me. I noticed a dramatically reduced contamination rate within my grain jars.
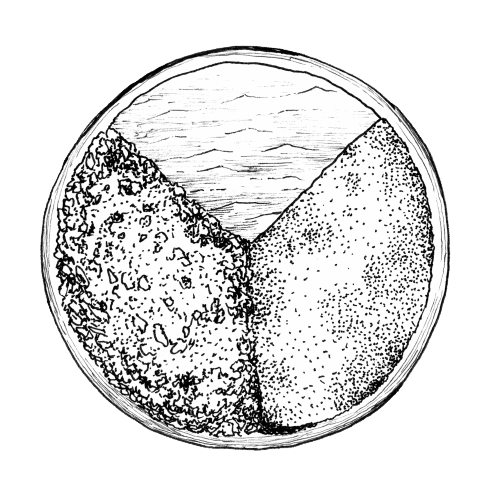
4. Agar Plate Strain Selection
This is definitely considered an advanced technique, but I’ve found it really helps to single out the strongest strains prior to inoculation. This helps culture fungi that are the most resistant to contaminants, the fastest growing, and procure the most mushrooms. It also helps to keep your stock going without having to buy more spores.
The process involves mixing up an agar solution with water, sterilizing it, and then pouring the solution into Petri dishes.
A drop of spore syringe, or spored collected from past grows is placed on the agar plate, and then into your incubator.
Within a few days, you’ll see mycelium spreading across the surface of the agar.
Select the best-looking sections — characterized by thick thread-like growth, rather than fuzzy or sporadic threading. Cut a small section of this growth from the plate, and add it to a fresh agar petri dish.
Once this strong mycelium covers most of the plate, you can cut it into smaller sections in front of a laminar flow hood and add it directly to your rye grain jars.
5. Growing Magic Truffles
A magic truffle is different from a magic mushroom.
Truffles refer to the underground portion of fungi. Certain species of mushrooms, such as Tuber melanosporum produce all of its reproductive tissue under the soil. This runs contrary to the classic mushroom you think of that grows above the surface of the soil.
In some countries, such as the Netherlands, only the underground parts of the fungi are considered legal, so cultivators have figured out ways to force magic mushroom species into producing underground “mushrooms” rather than the above-ground form.
This is done by fruiting the mushrooms in a container, rather than openly like you would for magic mushrooms. You can keep the mushies in a jar with some holes in the lid for airflow. The mushrooms will produce truffles if placed in these conditions rather than the mushrooms.
Not all species will make truffles so it’s important to look for specific varieties if you intend to grow this way. The best species for growing truffles are Psilocybe mexicana and Psilocybe tampanensis.
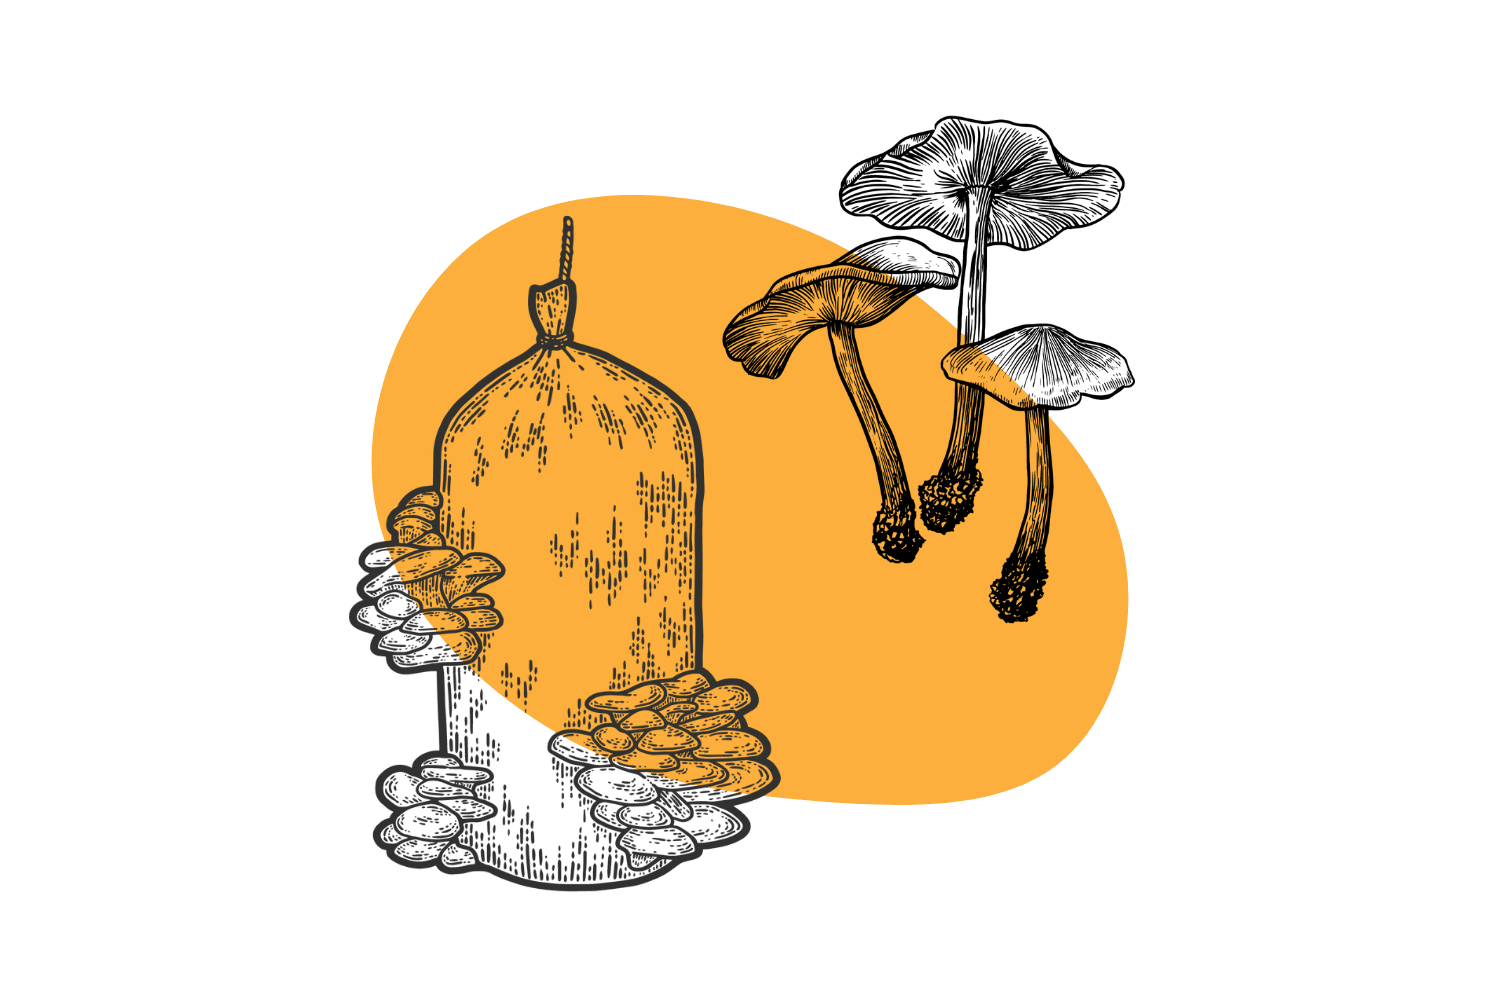
6. Spawn Bags
Spawn bags are another excellent method of production. They serve the same function as the jars but make fruiting even easier later on. You can fruit your mushrooms directly into the spawn bags if you want, or cut slits in the side for the mushrooms to grow out of the bag.
Spawn bags are a cheap way of making very large batches of substrate. This is the method you’ll often find at large grow operations operating in a mushroom greenhouse or other facility.
7. Self-Healing Injection Ports
I’ve touched on this briefly earlier on in the post. The idea involves poking holes in your jar lids and covering them with some sort of rubber seal. The spore syringes can be injected directly through the port to inoculate the substrate, and upon being removed, the rubber seals itself instantly. This technique significantly reduces the chances of contamination during the inoculation stage.
Frequently Asked Questions
1. Is it Legal To Grow Magic Mushrooms?
It’s illegal to grow or possess magic mushrooms in most parts of the world.
Spores are legal through a legal loophole because the law bans the active ingredients, psilocybin, and psilocin, which isn’t contained in the spores. The mushroom fruiting bodies, as well as the mushroom mycelium, however, are illegal.
Some parts of the world have already moved to decriminalize magic mushrooms, which also covers cultivation.
Magic mushrooms have been decriminalized in places like Denver, Colorado, Vancouver, Canada, and Oakland and Santa Cruz, California.
Related: Comprehensive list of legal psychoactive substances.
2. Can I Grow Amanita muscaria Mushrooms at Home?
Amanita muscaria is another species of psychoactive fungi that’s unrelated to the psilocybin-containing mushrooms. It’s much less psychedelic and more oneirogenic — which means dream-inducing.
It’s a dream substance that induces deeply bizarre dreams and dreamlike hallucinations.
Unfortunately, nobody has yet been able to reliably cultivate this mushroom. It shares a highly complex relationship with various tree species and old-growth forests. They’re endophytic, which means they live inside the roots of the host tree.

Currently, the only way to obtain this mushroom is to wildcraft it from temperate forests. They’re most abundant in the fall (in most geographic locations), but can be found sporadically throughout the spring and summer as well.
3. How Long Does it Take To Grow Magic Mushrooms?
From start to finish, it takes about 1 or 2 months to grow magic mushrooms depending on the growing conditions, strain selection, and techniques used. The fastest method is the PF Tek highlighted above.
- It takes 24 hours to prepare the substrate (accounting for the time needed for the substrate to cool down)
- It takes 2 weeks for the mycelium to colonize during incubation
- It takes 2–4 weeks to mature on the mycelium
4. What Temperature Do I Need For Incubating Magic Mushrooms?
The optimal temperature to incubate most Psilocybe species is between 20 and 28ºC (68–82ºF). This will promote the fastest growth of the mycelium.
5. What Temperature Do I Need For Fruiting Magic Mushrooms?
The optimal fruiting temperature for magic mushrooms is 10 to 20ºC (50–68ºF). Some species may prefer warmer temperatures, others may prefer cooler temperatures.
If the fruiting temperature is too hot, mushrooms will mold faster. If the temperature is too cold, growth will be slow and produce lower yields.
Conclusion: Why You Should Grow Your Own Mushrooms
The world is experiencing the third wave of psychedelics. The first wave happened a long time ago when early civilizations began dosing each other with entheogenic plants and fungi for the purposes of divination and healing.
The second wave started (and ended) in the 1960s with the counterculture and the emergence of hippie culture.
Now, we’re entering the third wave as more people become interested in the use of psychedelics for personal growth, spirituality, and healing.
There’s no better way to get into the world of psychedelics than by cultivating your own. Magic mushrooms are safe to grow and use and offer an exceptional array of existential and physical benefits.
Growing them yourself can bring us closer to nature, give us a deeper understanding of this incredible psychedelic substance, and could even save us some money along the way.
If you have any questions about growing magic mushrooms, don’t hesitate to reach out to us at high@tripsitter.com — we’d love to hear from you!